

This is a continuation of the 'getting started with Web Dev' series.
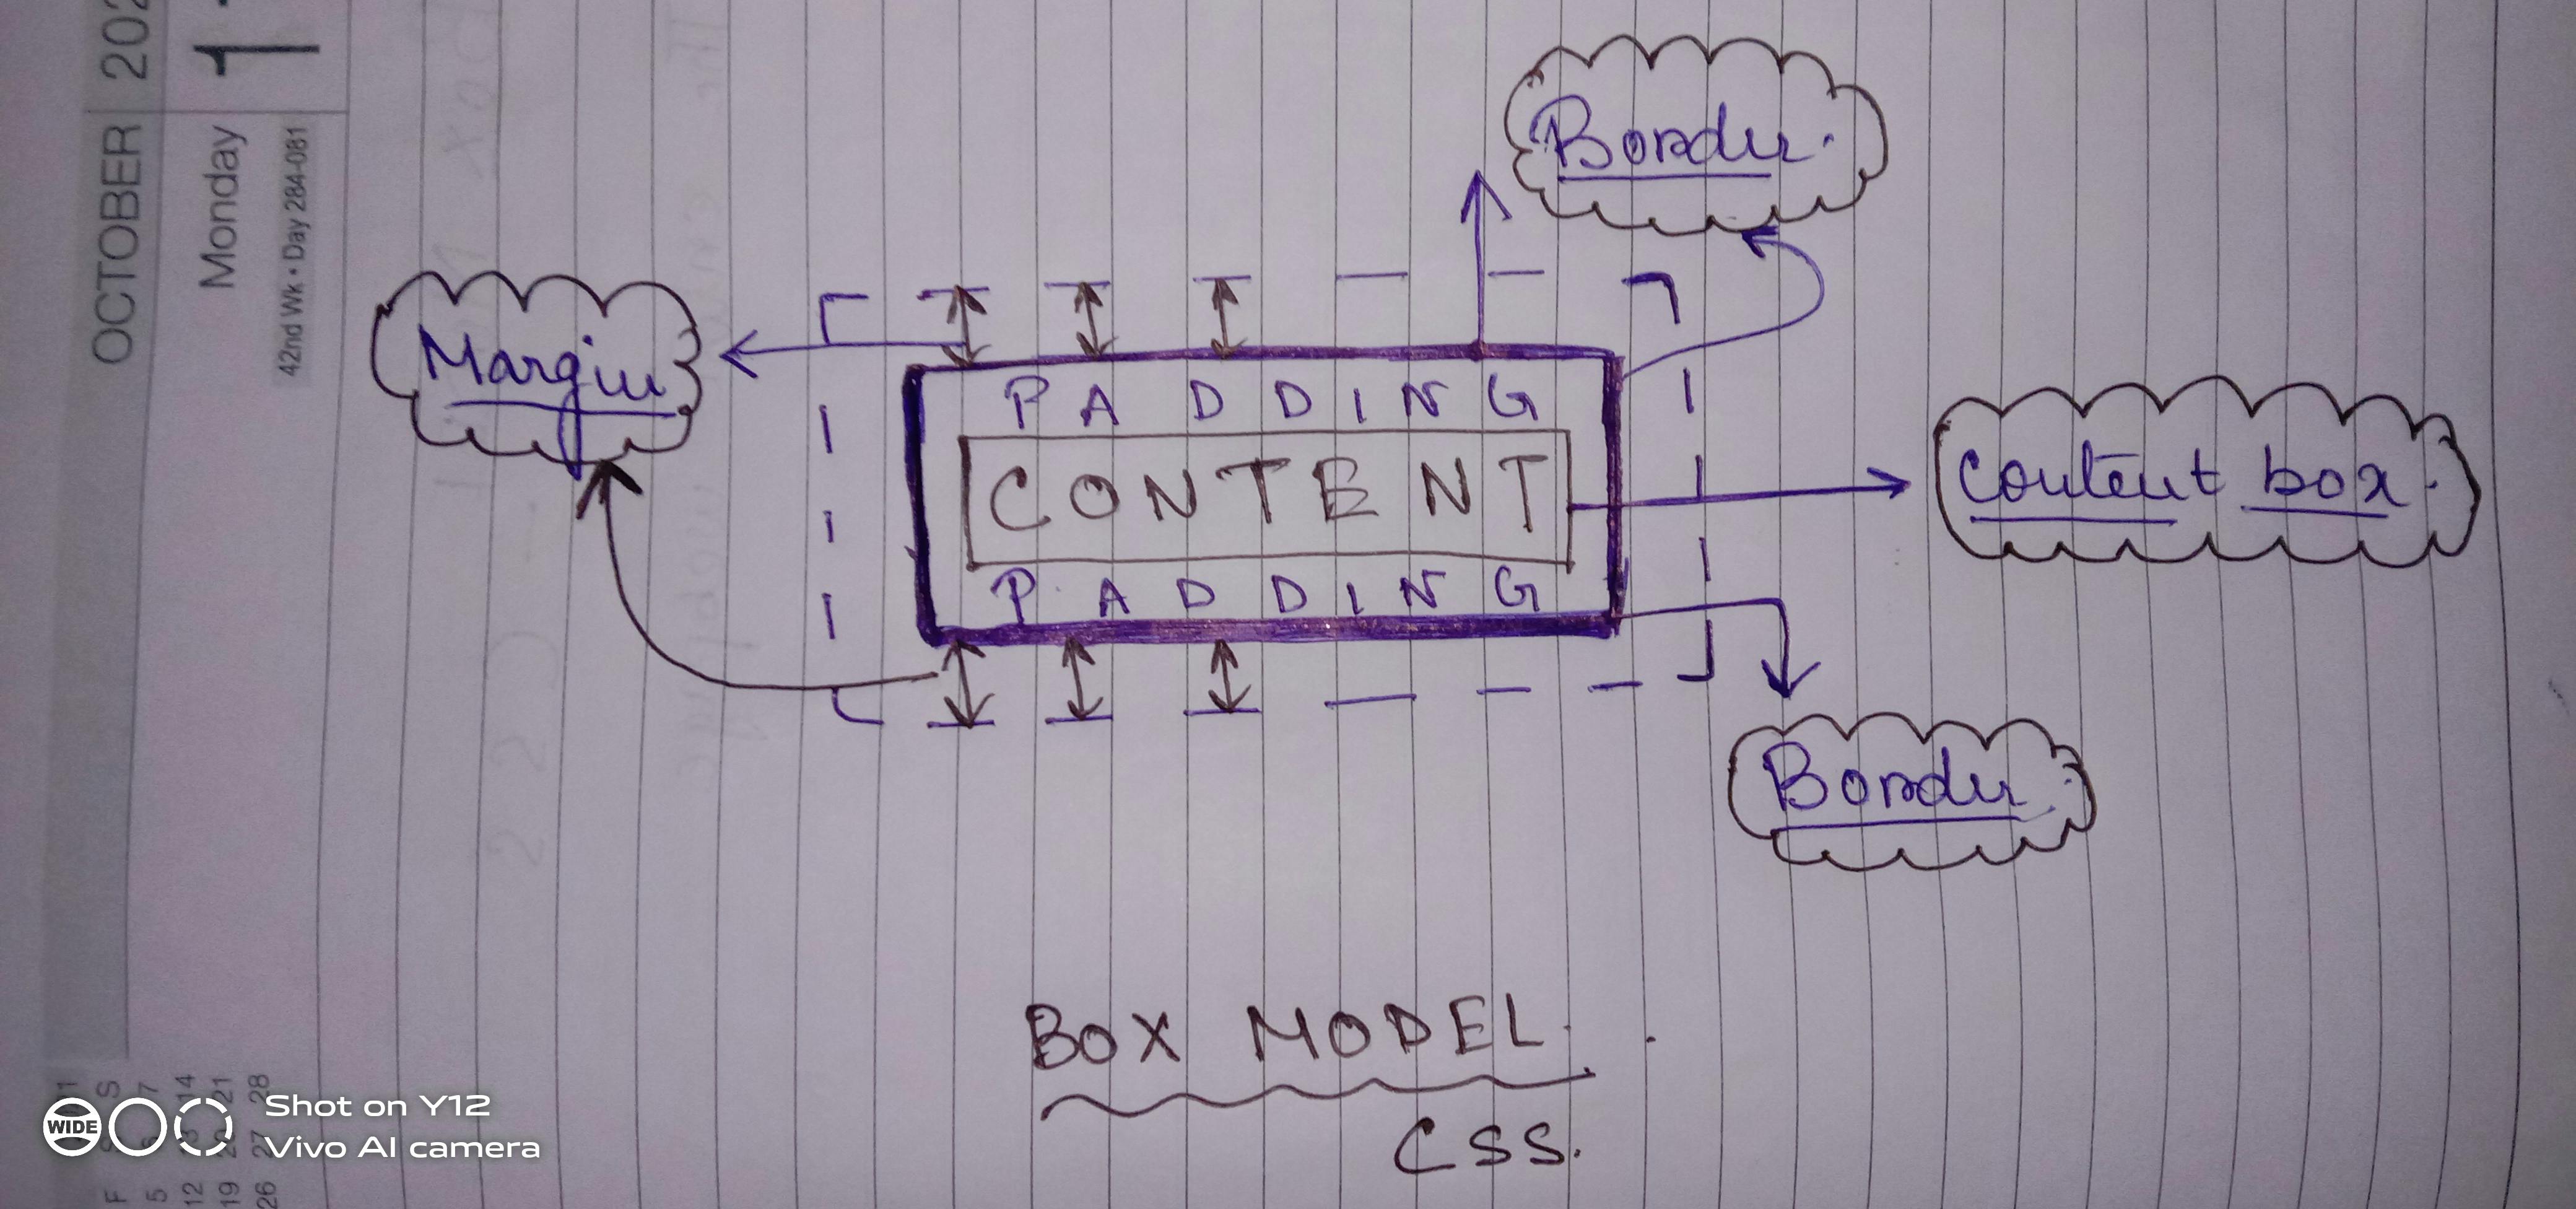
The Cover Image is my hand-drawn Image. I am terrible at drawings 😷so if it's not clear already, let's go through the scope of this blog.
Scope of this Blog?
- Why is Box Model important?
- What is Box Model?
- Attributes of Box Model.
- How are the Box Model attributes so intimately related to every element.
- Properties of the Box Model attributes that are manipulated for styles & layouts.
- Brief intro to how the Box Model attributes, can be used in styling.
- Quick Tips for DRY codes.
By the end of this blog, you will consider css as your close friend.
Why is CSS Box Model important?
The CSS Box Model is essentially important when we are thinking about designs and layout. It is one of the fundamentals of styling HTML elements, and hence, Web Development, in general.
What is CSS Box Model?
In the most simple terms, the box model is just a box, that wraps around every element(HTML) in a webpage.
In a more, development-centric way, it refers to the way every element in a webpage is modeled and rendered by browser engines, and their dimensions are directly derived from CSS properties.
The box model is classified into 4 properties, and :
- Margin
- Border
- Padding
- Content
Let us understand the attributes of the Box Model, systematically, and how they are used for layouts.
Content Box
This refers to the portion which contains the actual content. They can be text, images, or basically anything you can think of.
Border
We all know what borders are. We can call it, fence, or the bounded perimeter. The border just bounds the content. Imagine it like a football field. The sidelines are the borders. Isn’t it easy?
Now that we have understood, content and border, it will be much easier to understand the rest of the properties.
Padding
Padding refers to the space between the actual content and the border around it. You can not essentially see the padding of content, since it is transparent. But it provides a space between the content and its border. In other words, it provides space around the content inside the border of that content.
Margin
It is a no-brainer now, to guess about this attribute. Margin creates a space around an element. Margin provides a space outside the border. It is transparent too.
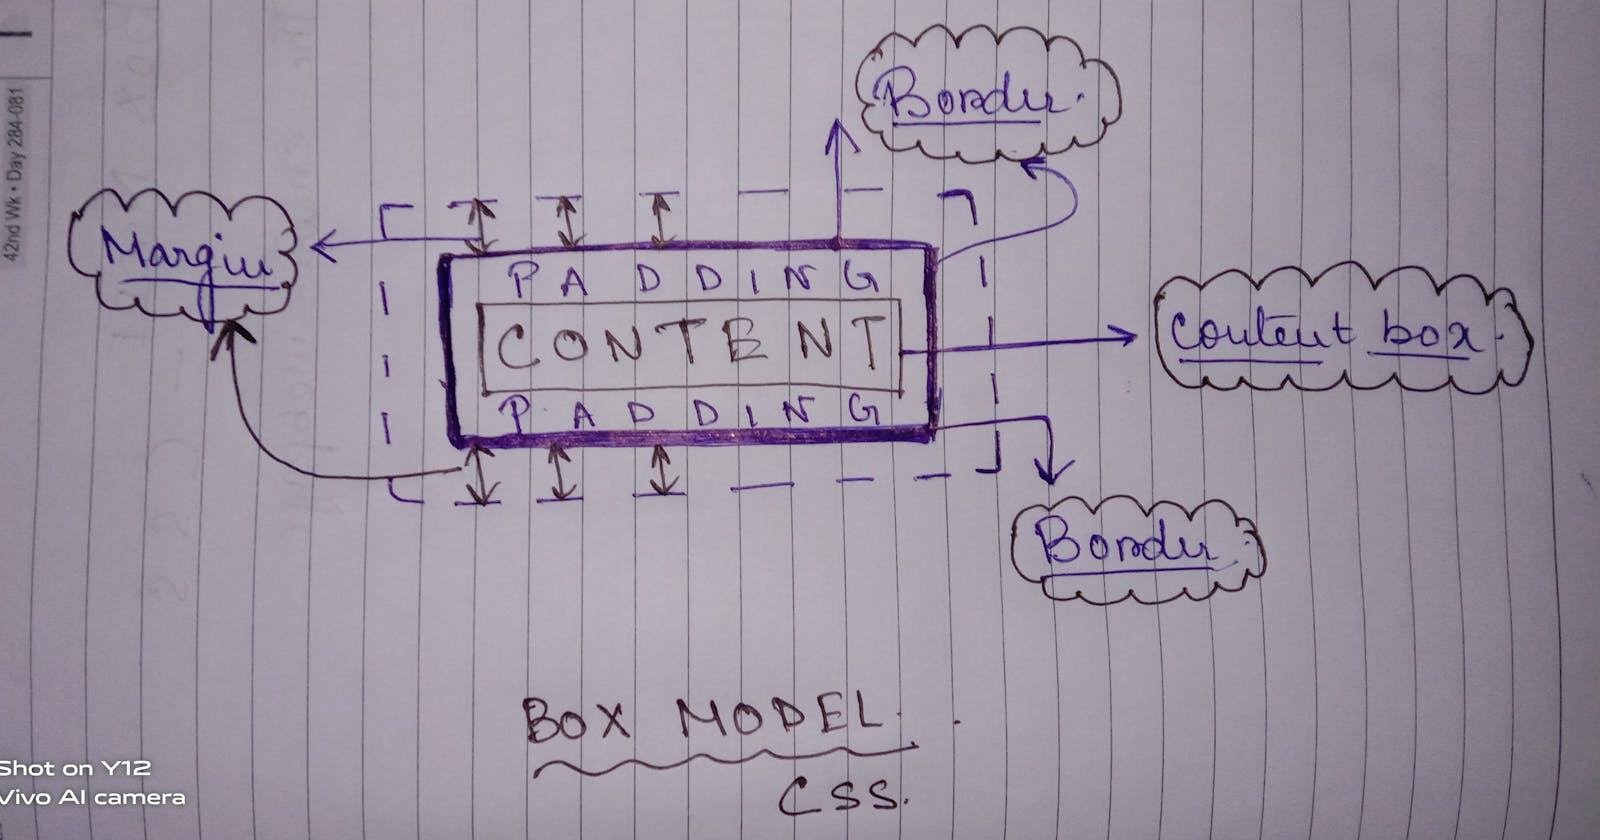
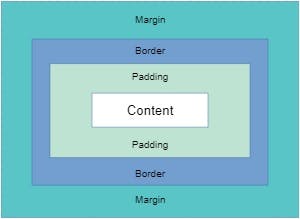
Below, is one of my hand-written diagram, where I have tried to explain the Box Model and it's attributes :
With the box model into play, it is important to note, how the Box Model attributes are integrated, into the total dimension of:
Total width of an element is calculated as the sum of :
width + padding-left + padding-right + border-left + border-right + margin-left + margin-right
Total height of an element is calculated as the sum of :
height +padding- top + padding-bottom +border- top + border-bottom + margin-top + margin-bottom
The top, right, bottom, left corresponds to the side of the boxes. Example:
- Padding-left, refers to the padding to the left of the content.
- Margin-right, refers to the margin to the right of the content.
- Border-top, refers to the border to the top of the content.
How to use them for styling & layouts?
Each of these attributes has its own properties. With CSS we can have total control over them and the layout.
Generalizing the properties for all, all of them has properties corresponding to each side, they are :
- top
- right
- bottom
- left
You have probably noticed this, while we were reading about, how the total dimensions of an element are calculated.
Let us quickly walkthrough through how they are used with a code snippet.
div{
width : 60px;
height : 60px;
margin-right : 3px;
margin-left : 3px;
margin-top : 4px;
margin-bottom : 4px;
padding-top : 2px;
padding-bottom : 2px;
padding-right : 3px;
padding-left:3px;
border-top: 2px solid black;
border-right : 2px solid black;
}
By the look of it, we are styling a div. The div has :
- height and width of 60px.
- margin-right and left of 3px.
- margin-top and bottom of 4px.
- padding-top and bottom of 2px.
- padding-left and right of 3px.
- & 2px thick solid black border on the top and left.
Can you guess, the total height and width of the div element, now? 🤔
Tips for writing DRY CSS.
DRY in terms of writing code refers to 'Don't Repeat Yourself The above code snippet, as we can see, is completely the opposite of DRY. often referred to as 'WET" code. (Write Everything Twice)
DRY codes are highly recommended. To write Dry CSS, we must use shorthand properties. Let's take a quick look at how.
Consider the following code snippet
div{
width : 60px;
height : 60px;
padding : 2px 3px;
margin : 4px 3px;
}
This code snippet does exactly the same as the previous snippet(except the borders)
What did we do?
- Instead of using padding-right/left/top/bottom, or margin-top/right/bottom/left repeatedly, we used a shorthand.
The shorthand syntax :
Padding : padding-top padding-right padding-bottom padding-left; Margin : margin-top margin-right margin-bottom margin-left;
div{
padding : 2px 3px 2px 3px;
margin : 4px 3px 4px 3px;
}

They can even be further reduced to ,

div{
padding : 2px 3px;
margin : 4px 3px;


div{
margin : 3px 0;
padding : 0 3px;
}

In this case, the div has a margin-top and bottom of 3px & padding-right and left of 3px.
Quick Tip for remembering the short hand :
The sequence is Top -> Right -> Bottom -> Left. So, it is a clockwise direction, from top -> clockwise direction.
CSS is not intimidating at all, once you understand the fundamentals and play with them.
This mini-blog is just related to the Box Model and is part of the 'Web Development' series. I have tried to keep it as simple as possible. Hope this was useful and not too complicated. ✨
Have a wonderful weekend 🎉